CanHap Lab 3: Communicate something w/ Haply
Task: Create a small vocabulary of communicative moments with three words. These words should be communicated through something programmed in the Haply with minimal audio and graphical feedback. Evaluate the sketch with people to get their responses to what you made.
Source code can be found here. I worked together with Rubia for this lab. We have been working together a lot on interaction feelings for our course project, so we thought it might be nice to continue to explore these types of interactions together in this lab as well. Due to a miscommunication in the lab, we actually came up with 4 interactions in total. Special thanks to Kattie, Unma, Preeti, and Spencer (non-haptics person) for testing!
We brainstormed words to describe how we might approach different interactions. Our 4 words/modes and their rendering features were:
- Sticky, syrupy –– regions with different dynamics
- Curvy, bouncy –– static object
- Bumpy, spaced –– static object
- Sandy, grainy –– dynamic object
Mode 1: sticky, syrupy
For this mode, we aimed to accomplish something that felt relatively sticky and syrupy. What does something sticky and syrupy feel like? Well when something is sticky, you are still able to move, but it is difficult, an almost delayed reaction of movement and force. You push harder to move, and once released from the sticky surface, your force exerted propels you in that direction. Similar for syrupy, but without the release until you are out of the syrup. We accomplished this mode through viscous regions defined with different damping values.
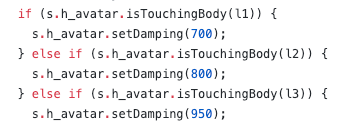
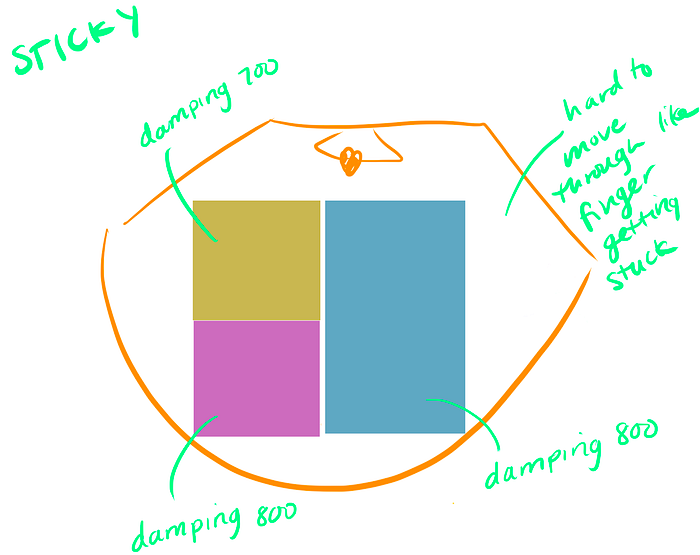
We coded three box bodies (shown left) using the Fisica package. Inspired by the water layer in the maze example, instead of changing the damping of the region bodies themselves, we changed the damping of the avatar as it is touching the body.
When the s.h_avatar.istouchingBody(), the damping changes to s.h_avatar.setDamping(). We aimed for each region to have a distinct stickiness, we played around with the damping values until we found that each region felt distinctly different, while still sticky. The video below shows the concept of stickiness and syrupy as described above.
Mode 2: bouncy
This mode we focused on making something that felt bouncy. Static objects were something we felt we could change the bounciness of. As you hit an object you can bounce off of it. Inspiration of this implementation came from the walls in the hello wall example. When you wouldn’t have a good grip on the end effector it would be possible to shoot it off in the opposite direction.
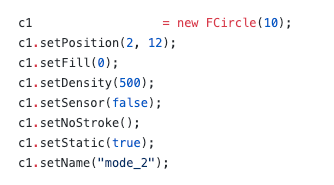
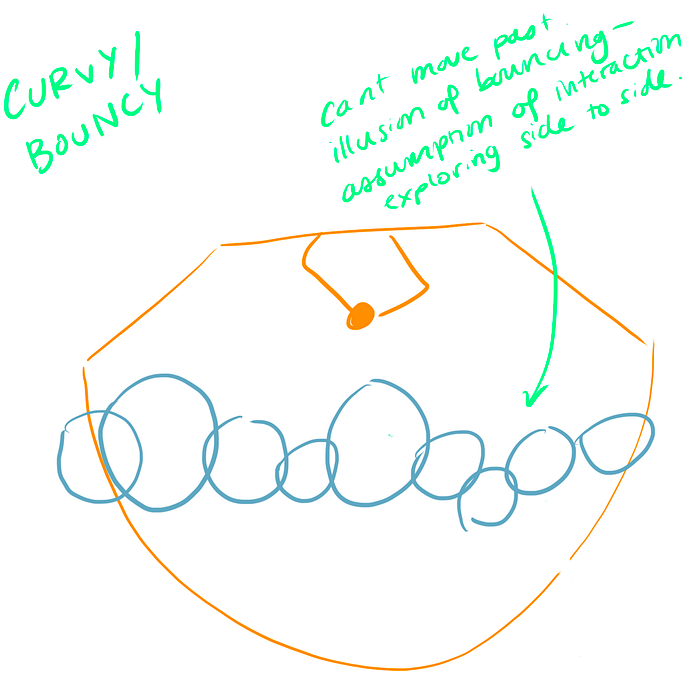
We created a bunch of differently shaped circles that would be impenetrable. To make them impenetrable we just had to set their sensor to false: cx.setSensor(false); in their initialization in void setup(). For the interaction, people have the freedom to explore the region, but encounter a fairly large boundary. We used a metaphor (and a bit of humor) to inspire this design: The boundary symbolizes the last push for the end of course work within a grad degree. You sometimes hit the boundary as a wall, and edge your way along with highs and lows.
While a little grim, this did help with the design of the overall shapes and simulation to bouncing. We make an assumption of the kind of exploration the person might use. This is a slight oversight on our part, since people explore in various ways, we assumed that the exploration would be horizontal through the workspace. In doing so, they would feel the bounciness. If exploring vertically, they would feel an obstacle. The video below shows the assumed exploration.
Mode 3: bumpy
This mode aimed to simulate texture through static objects. We created another boundary, similar to the approach in the previous mode. We wanted to make a series of equally sized objects spaced apart exactly the same across the screen. We figured creating a new body for each one would be quite time consuming, so we explored the ways in which we would be able to create this through a for loop. Luckily, through the first lab, I found out that you can create multiple bodies with the same name, so we wanted to use this feature to our advantage.
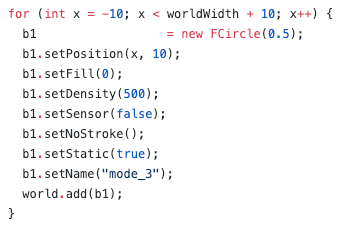
Initially, we put this loop (left) in the setup() function, but soon realized that since we wanted to toggle these modes on and off, the way we were adding them with the same name only added the last circle in the loop. Through a little bit of debugging we were able to add and remove all of the circles by putting the entire world.add(b1); loop in the keyPressed() function.
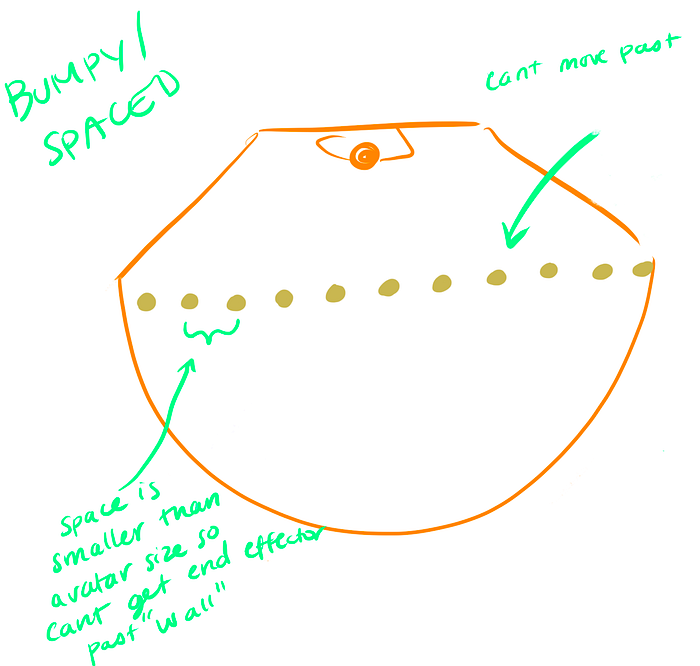
Each circle is spaced evenly apart. We wanted to make sure these circles acted like a textured boundary, so we made sure the spaces between each b1 circle was smaller than the avatar size.
Again, we assume the exploration in this mode would be horizontal. Like the above mode, without moving back and forth along the bodies the perception of the texture would be lost. Video below shows the intended exploration.
Mode 4: sandy, grainy
This mode renders texture to emulate a sandy, grainy surface. With our sketched version of texture in the previous mode, we aimed to tackle actually rendering some texture. With our inspiration from some of the work with forces of music notes in our group project, Rubia and I experimented with random() when generating a force.
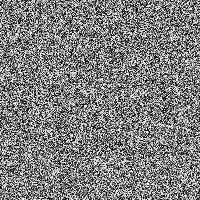
At first we were inspired by the idea of static. The image on a TV that is commonly paired with pink noise. The above image is what we were able to generate in our environment. With each pixel on a 200x200 square randomly assigned a greyscale value between 0 and 255. We quickly learned that rendering texture this way slowed down the simulation drastically, and pivoted our approach.
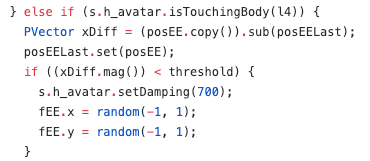
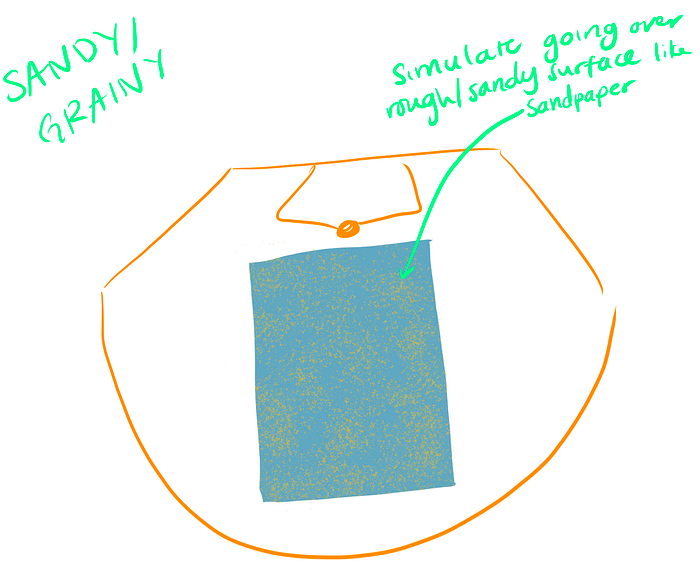
We turned to what was working for our musical notes in the group project. Part of the idea behind exploring this texture is to implement it in our project (hitting 2 birds with 1 stone here). When the force was just
fEE.x = (-1,1);
fee.y = (-1,1);
the region in which we created felt like a small bump. When we put the forces to generate randomly, we get a quickly changing force within the run() function that rapidly changes and runs repeatedly at 1kHz.
Video below shows the sandy, grainy texture generated. We found that the audio and force from the motors themselves also adds to the experience. While the end effector gives quite a bit of feedback, the mode was elevated through the entire table vibrating and making grinding-like noises.
Evaluation
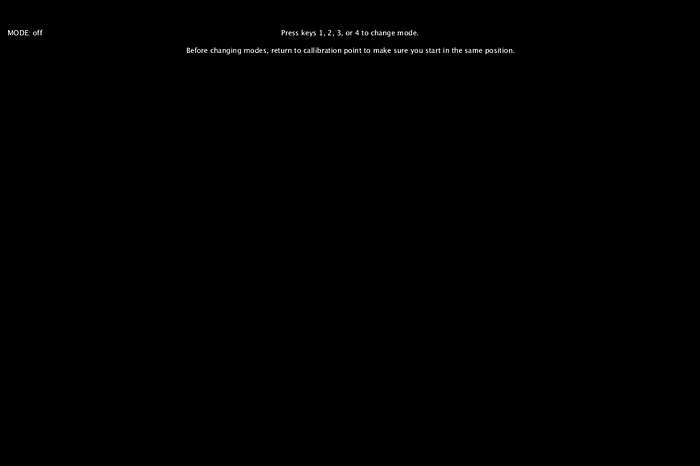
We evaluated our 4 modes with 3CanHap students and 1 non-haptic knowledgable person. The instructions were shown on the screen that the user could see (below). As discussed above, some modes should have had a bit more instruction to indicate what type of exploration/movement they were to use with the end effector.
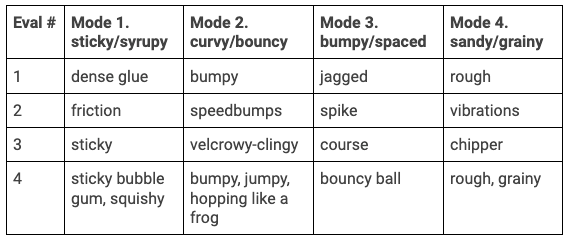
Our responses overall reflected a similar sentiment to what we were going for. Eval 1 had almost the same descriptive words as what we intended, which gives us confidence that our interactions were somewhat effectively communicated. Using adjectives in this case proved to be a bit difficult, since when feeling something the default is to usually compare it with a tangible object rather than an adjective or affect. In some cases this happened — eval 2: mode 2; eval 3, mode 4; eval 4 modes 1, 2, and 3.
From our initial evaluation and relatively informal analysis (just comparing words from our own inferences), we have found that mode 1 and 4 are likely the most “believable” and emulated what we intended. Modes 2 and 3 had a bit more variety, although none were super off base.
Conveying these things over just haptics is interesting. The way people interact and explore varies so much, without the multimodal approach you don’t know what to expect.
Reflection
Overall, I found this lab to be more fun than I anticipated. Honestly, when this lab was assigned with its original due date, I had absolutely no idea how I was going to approach it. Rubia and I brainstormed words like: bouncy (using guided movement), star (using a star-shaped static object), and heavy (our plan was to explore the concept of thrust, by pushing an object into a dense liquid). At the time this was daunting. I have learned a lot in the past few weeks, from the project, readings, as well as lab 4. All of this has helped my understanding and built my confidence in a more creative, open-ended haptic design approach. Without those other experiences I think the end product would have looked very different from what it is now.
A bit of debugging was done throughout each mode. We ended up writing an entire keyPressed() function to switch modes, but had some difficulty with removing bodies. We ended up writing a function to remove bodies. While looking at the documentation of the Fisica package, we found that bodies can be added to an ArrayList<FBody>. By naming the bodies for each mode, we were able to effectively add and remove bodies with a removeBodyByName() function. Using these features of the Fisica package were extremely helpful to implement our mode changes.
As for the evaluation, from these results, mode 1 proved to be effectively communicated. Mode 4, aside from the chipper response (which is actually reference to a wood chipper, so somewhat accurate), the texture was well communicated. This is promising for the implementation of the texture Rubia and I will be implementing in our project — yay!
Lastly, since this is the last lab, I figured I might as well reflect on the labs as a whole. I think that the labs were an excellent exercise to getting familiar with the concepts commonly used in haptics. As well as an approachable open source, (somewhat) DIY tool to create grounded force feedback. One suggestion I have would be to diversify the examples given. While we are learning about the concepts, I found it limiting to know mostly the Fisica package on the 2diy site. PID was also a good example that there are other ways to implement force feedback with the Haply, but information on this felt limited. I am excited to continue exploring Haply and the different implementation tactics through our group project.
